
How to Pack Dishware
Packing dishes can be a frustrating and tricky process. The kitchen is a room that is best done at the end of your packing because of the sheer volume of fragile and odd shaped items. It is also one of the most time-consuming rooms to pack up.
What’s the best approach for packing kitchen items, and particularly dishes? Make a plan and be very organized. We’ll talk about some of the most important points for packing dishes and related kitchen items.
Materials for Packing Dishes
Start your packing preparation by assembling the right packing materials. You must have some boxes to pack your dishes in, and you can use just use any boxes, but there are special boxes you can get for dishes. A dish box is a type of moving box for fragile items. They are made with a double layer of cardboard in the walls and base. Dish boxes are slightly more expensive, but the extra investment will better protect your dishes during a move. You can also get cell packs that fit inside dish boxes, which are also useful for packing a lot of drinkware or stemware.
You will also need some medium-sized packing boxes, bubble wrap, packing tape, labels and markers. And don’t forget to have a large amount of packing paper or newspaper for wrapping items. Newspaper will work, but packing paper is better. Newspaper ink tends to smudge and can get onto items. Staining from newsprint is not usually a problem, but it is possible for the ink to be absorbed by porous items. Pack any fine china in packing paper only.
Dishes
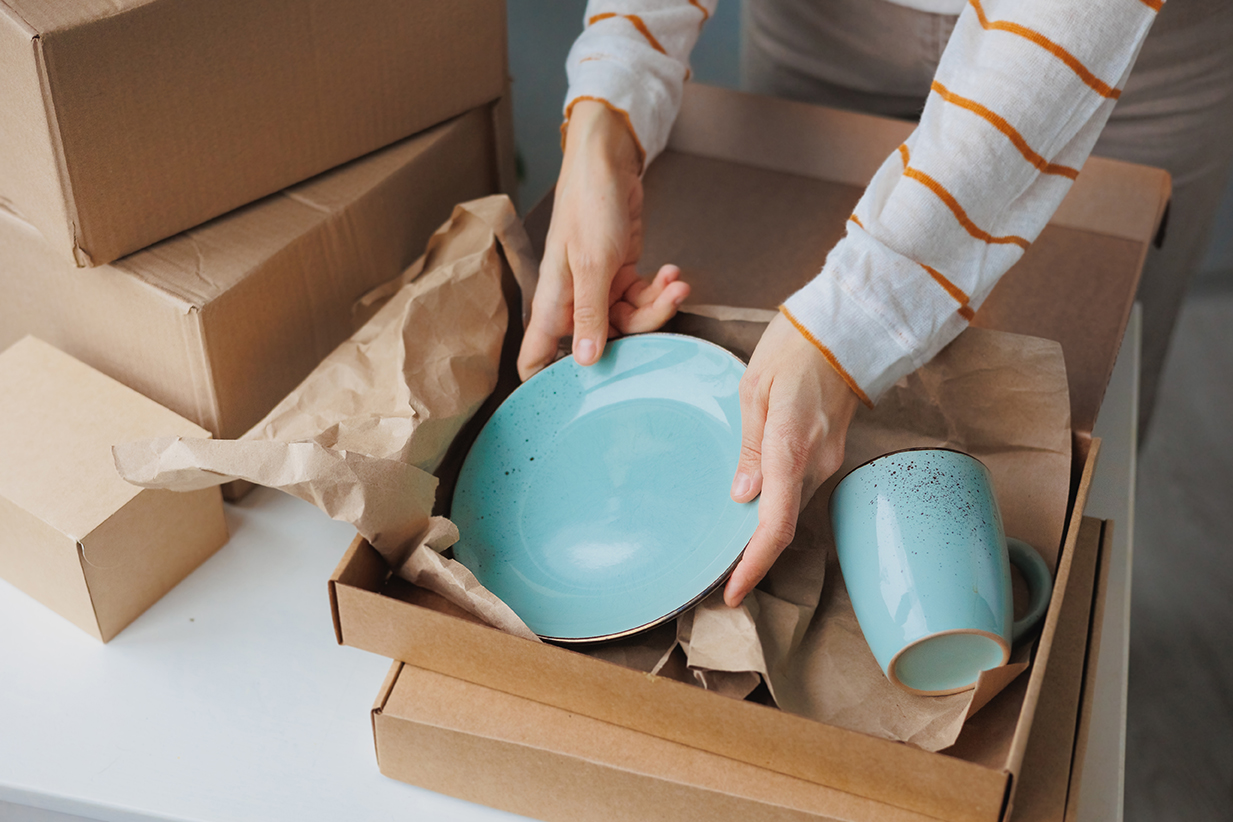
To set up for packing your dishes, get out the dishes you want to pack and organize them on a large, open, and flat surface. Organize your dishes into groups of similar sizes and types.
Put your boxes together with heavy-duty packing tape and reinforce the bottom and all seams. Place a six-inch layer of crumpled packing paper in the bottom of the box.
Packing a set of dishes:
- Take the first dish, place it in the center of a piece of packing paper, pull the corners of the paper firmly (but not too tight) over the plate.
- Repeat this process with three more plates of the same size.
- Stack the set of four plates, turn the stack upside down on top of another sheet of packing paper, wrap the set, and secure it with tape.
- Place the set in a small box, stand the dishes up vertically on a thick layer of packing paper. Dishes set flat are more likely to break when moved.
- Repeat the above steps to add additional sets until the box is packed snugly. Place the heaviest sets on the bottom. Lighter ones on top.
- Make sure the box it not too heavy. Fill all the empty spaces in the box with crumpled paper, bubble wrap, rolled dish towels, or napkins.
- Fill the top and all four sides with more packing paper, then completely tape the box closed.
- Label the top and sides of the box “Fragile” and mark the top “This Side Up.”
- Use this same process for bowls and platters of similar sizes.
- Label any boxes that may need to be unpacked first, like coffee pots and cups.
Cups and Glasses
Organize your drinkware in groups by similar sizes and shapes. Assemble your boxes (dish boxes or regular boxes) and line the bottom of the boxes with clean towels or similar material.
- Fill the cup or glass interior with wads of packing paper.
- If the cup or glass has a handle, then crumple some paper and wrap it around the handle.
- Wrap a double sheet of packing paper or bubble wrap around it. Secure it with tape.
- Place the glasses or cups in the box upright in rows.
- If your box has extra space, place a second layer of items on top of the first. Place a layer of crumpled paper between the layers of items, and fill any empty spaces in the box with more paper or other soft materials.
- Close the box and seal it up with tape.
- Label each box as “Fragile” on the top and sides, and mark the top side with “This Side Up.”
- For extra protection, pack each box in another larger box. Add packing paper on all sides. This step applies to any fragile items (for moving or shipping).
Teapots
Teapots are often odd shapes and have a lot of protruding parts. So, it is important to wrap them carefully and completely. Wind rolled-up paper around the handle, placing additional paper around the spout. Insert the teapot upside down on the bottom corner of several pieces of stacked of packing papers. Fold a few pieces over until you have a bundle, then tape it down. Wrap the lid separately and put both together in the same box. Place the teapot upside down in the box.
Wine Glasses / Stemware
Stemware is more fragile than most everyday glasses. Use the same process as with packing normal glassware, but use extra paper around the stems of fine wine glasses to create additional padding. It is also a good idea to double-box any stemware that is very fragile or expensive. When placing a box of stemware on the truck, place it into a larger box and surround that box on all sides with a lot of additional packing material.
Final Tips for Packing Dishes
- Being organized is key. Have all your materials prepared and your items sorted before you start packing them.
- Take your time. Make sure you have plenty of time to do the job carefully.
- Fill boxes up to the top. Lighter items like plastic can be used to fill space in boxes with heavier breakables (in a single layer).
- Don’t overload the boxes. Most boxes should be under 40 pounds. Heavy boxes are more likely to be dropped.
- Load the heaviest boxes into the moving truck first. Load progressively lighter boxes as you go. Make sure the stacks of boxes are secure and will not fall over. Also ensure that heavy items will not shift in transit, so they don’t crush other boxes.